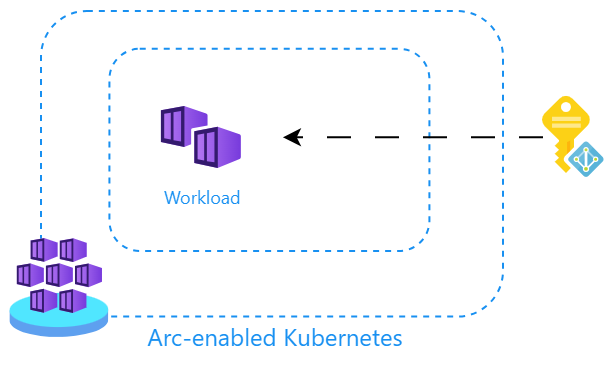
Arc-enabled Kubernetes and Microsoft Entra Workload ID
Posted on: May 13, 2024Microsoft Entra Workload ID (previously known as Azure AD Workload Identity) enables you to use managed identities for your workloads running in Kubernetes clusters.
In this post, we’ll see how to use workload identity with Azure Arc-enabled Kubernetes:
Here are the high-level steps for our deployment:
- Create a managed identity
- Assign the managed identity reader permissions to the subscription
- Create service account signing keys
- Generate a RSA key pair
- Create Storage Account and Blob Container
- Create an endpoint for OpenID Connect discovery document
- This is the metadata document (a.k.a. “well-known endpoint”)
- Create an endpoint for JSON Web Key Sets (JWKS)
- These are the public keys that are used to verify the JWT tokens
- Create a Azure Arc-enabled Kubernetes cluster
- Setup workload identity
- Install Mutating Admission Webhook
- Create a Kubernetes service account
- Deploy a workload that uses the service account
- Use managed identity to access Azure resources
I’ll show main steps in this blog post and you can find the full code with details in this repository:
 JanneMattila/azure-arc-demos/k8s/workload-identity
These below steps are based on the Azure AD Workload Identity documentation.
1. Create a managed identity
Let’s start by creating a managed identity and assigning it Reader access to the subscription:
identity_json=$(az identity create --name $app_identity_name --resource-group $resource_group_name -o json)
client_id=$(echo $identity_json | jq -r .clientId)
principal_id=$(echo $identity_json | jq -r .principalId)
echo $client_id
echo $principal_id

subscription_id=$(az account show --query id -o tsv)

# Grant reader access to subscription for our newly created managed identity
az role assignment create \
 --assignee-object-id $principal_id \
 --assignee-principal-type ServicePrincipal \
 --scope /subscriptions/$subscription_id \
 --role "Reader"
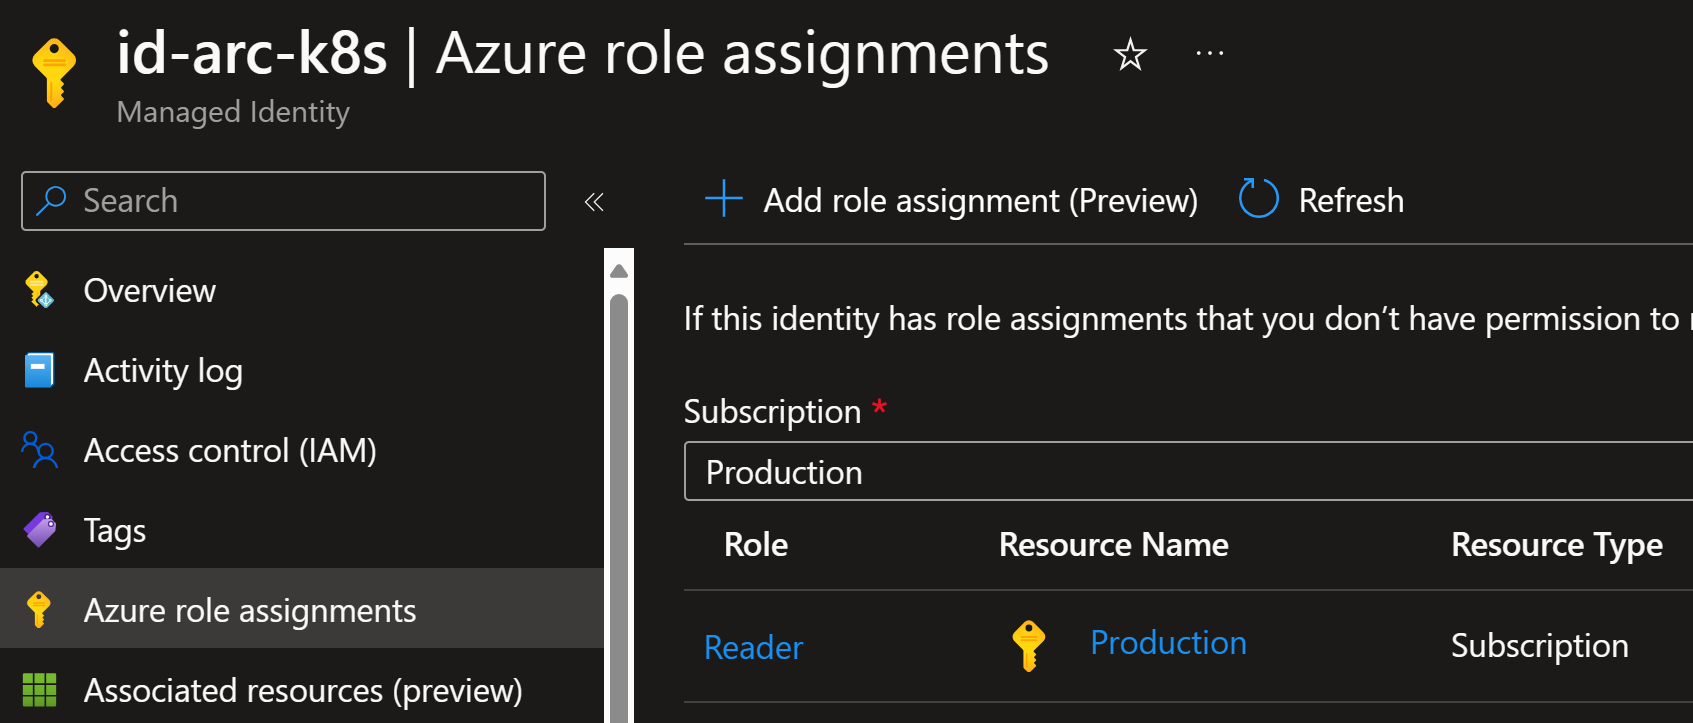
We have now $client_id and $principal_id that we can use in the next steps.
2. Create service account signing keys
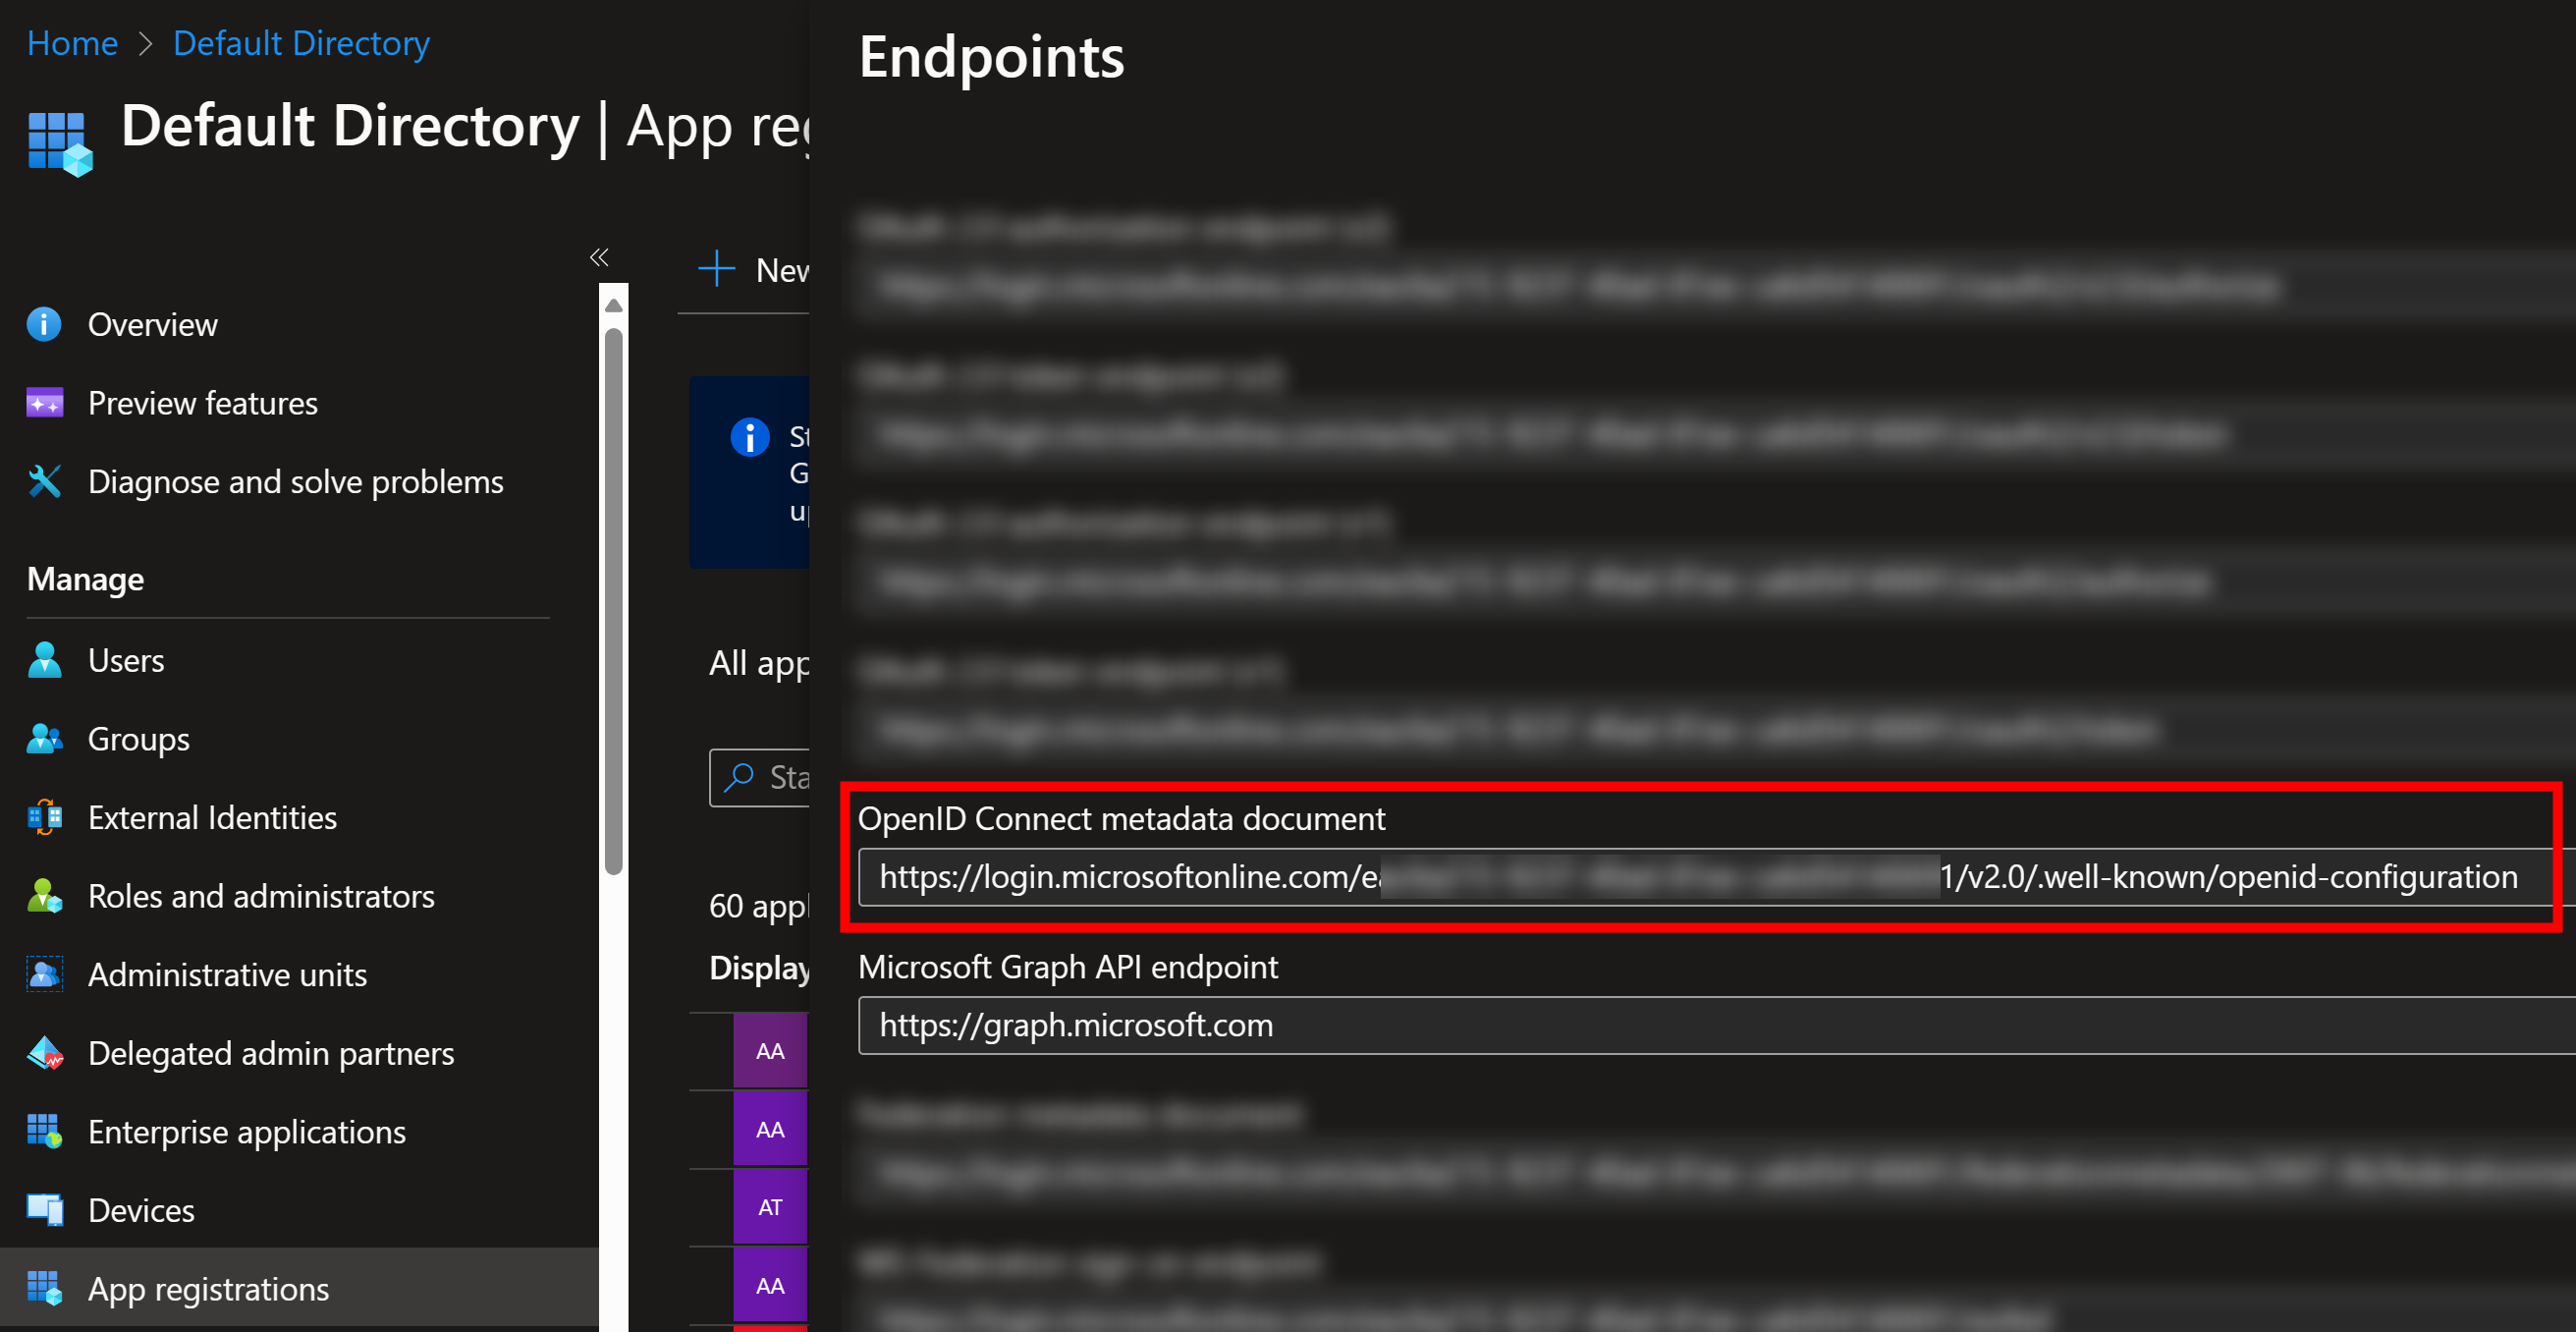
Before we start creating the keys and publish endpoints, we should understand the purpose of these keys. These keys are used to sign the JWT tokens that are used to authenticate the service account. In other words, these keys are used to prove that the service account is who it says it is. Since our cluster creates the tokens, it needs to have the private signing key to be able to create them. Verification is done in Entra ID so it has to have access to the public part of the signing key. Therefore, we need to publish the public signing key to a publicly accessible location.
Similarly, your Entra ID OpenID Connect metadata document has well-known location and it is publicly accessible:
https://login.microsoftonline.com/<tenantid>/v2.0/.well-known/openid-configuration
Let’s generate private and public signing keys for us:
openssl genrsa -out sa.key 2048
openssl rsa -in sa.key -pubout -out sa.pub
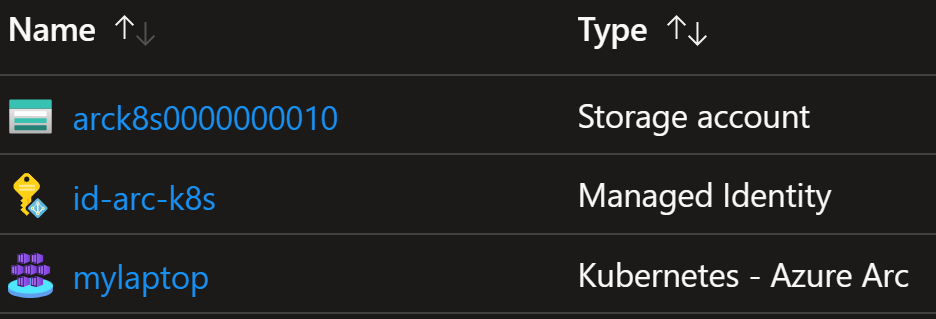
Then we need to create a Storage Account and Blob Container which we will use for publishing the metadata document and public key:
az storage account create \
  --resource-group $resource_group_name \
  --name $storage_name \
  --allow-blob-public-access true

az storage container create \
  --account-name $storage_name \
  --name $container_name \
  --public-access blob
Generate discovery document by filling in the values to openid-configuration.json:
{
  "issuer": "https://${storage_name}.blob.core.windows.net/${container_name}/",
  "jwks_uri": "https://${storage_name}.blob.core.windows.net/${container_name}/openid/v1/jwks",
  "response_types_supported": [
    "id_token"
  ],
  "subject_types_supported": [
    "public"
  ],
  "id_token_signing_alg_values_supported": [
    "RS256"
  ]
}
For reference, you can get the issuer URL of your AKS cluster from the Azure CLI with the following command:
$ az aks show -n $aks_name -g $resource_group_name --query "oidcIssuerProfile.issuerUrl" -o tsv

https://uksouth.oic.prod-aks.azure.com/71359404-8088-49e1-b34c-66b358cfd4b5/eb0b0518-ecdc-49d2-b7ca-9fc46bba1fba/
Out of interest, I did a test with the issuer URL without / in the end and it worked fine.
Generate JWKS document by using the public key sa.pub:
azwi jwks --public-keys sa.pub --output-file jwks.json
Then we upload these files to the Blob Container and test that both endpoints are working correctly:
curl -s "https://${storage_name}.blob.core.windows.net/${container_name}/.well-known/openid-configuration"
Output:
{
  "issuer": "https://arck8s0000000010.blob.core.windows.net/oidc/",
  "jwks_uri": "https://arck8s0000000010.blob.core.windows.net/oidc/openid/v1/jwks",
  "response_types_supported": [
    "id_token"
  ],
  "subject_types_supported": [
    "public"
  ],
  "id_token_signing_alg_values_supported": [
    "RS256"
  ]
}
curl -s "https://${storage_name}.blob.core.windows.net/${container_name}/openid/v1/jwks"
Output:
{
  "keys": [
    {
      "use": "sig",
      "kty": "RSA",
      "kid": "L2ugCzm68GebOnJR4dW9zicM8H2ixnjkyrFnurkQCYo",
      "alg": "RS256",
      "n": "yUJgjFBfnc...wQ",
      "e": "AQAB"
    }
  ]
}
Preparations are now done and we can move to the next step.
3. Create a Azure Arc-enabled Kubernetes cluster
Now we need to create a Azure Arc-enabled Kubernetes cluster.
Since we need to provide parameters to the api server, at least
I couldn’t find easy way to do this with Docker Desktop Kubernetes.
We must pass service-account-issuer, service-account-key-file,
service-account-signing-key-file, service-account-private-key-file to the api server,
so that it will know where to find the required signing keys etc.
We can use
Kubernetes in Docker (kind)
for this purpose since it’s easy to setup.
It works great with Docker Desktop. I just disabled the Docker Desktop Kubernetes and used kind instead.
Here is how to install kind:
curl -Lo ./kind https://kind.sigs.k8s.io/dl/v0.22.0/kind-linux-amd64
chmod +x ./kind
sudo mv ./kind /usr/local/bin/kind
Then we can create a cluster with the following configuration (fill in the values from variables):
kind: Cluster
apiVersion: kind.x-k8s.io/v1alpha4
nodes:
- role: control-plane
  extraPortMappings:
  - containerPort: 30000
    hostPort: 30000
    protocol: TCP
  extraMounts:
    - hostPath: ${service_account_key_file}
      containerPath: /etc/kubernetes/pki/sa.pub
    - hostPath: ${service_account_signing_file}
      containerPath: /etc/kubernetes/pki/sa.key
  kubeadmConfigPatches:
  - |
    kind: ClusterConfiguration
    apiServer:
      extraArgs:
        service-account-issuer: ${service_account_oidc_issuer}
        service-account-key-file: /etc/kubernetes/pki/sa.pub
        service-account-signing-key-file: /etc/kubernetes/pki/sa.key
    controllerManager:
      extraArgs:
        service-account-private-key-file: /etc/kubernetes/pki/sa.key
IMPORTANT: $service_account_oidc_issuer must be exactly the same as the issuer in the openid-configuration.json.
Create the cluster:
kind create cluster \
  --name azure-workload-identity \
  --image kindest/node::v1.29.2 \
  --config cluster.yaml
After the cluster is deployed, we can Arc-enable it:
az connectedk8s connect \
  --name "mylaptop" \
  --resource-group $resource_group_name \
  --location $location
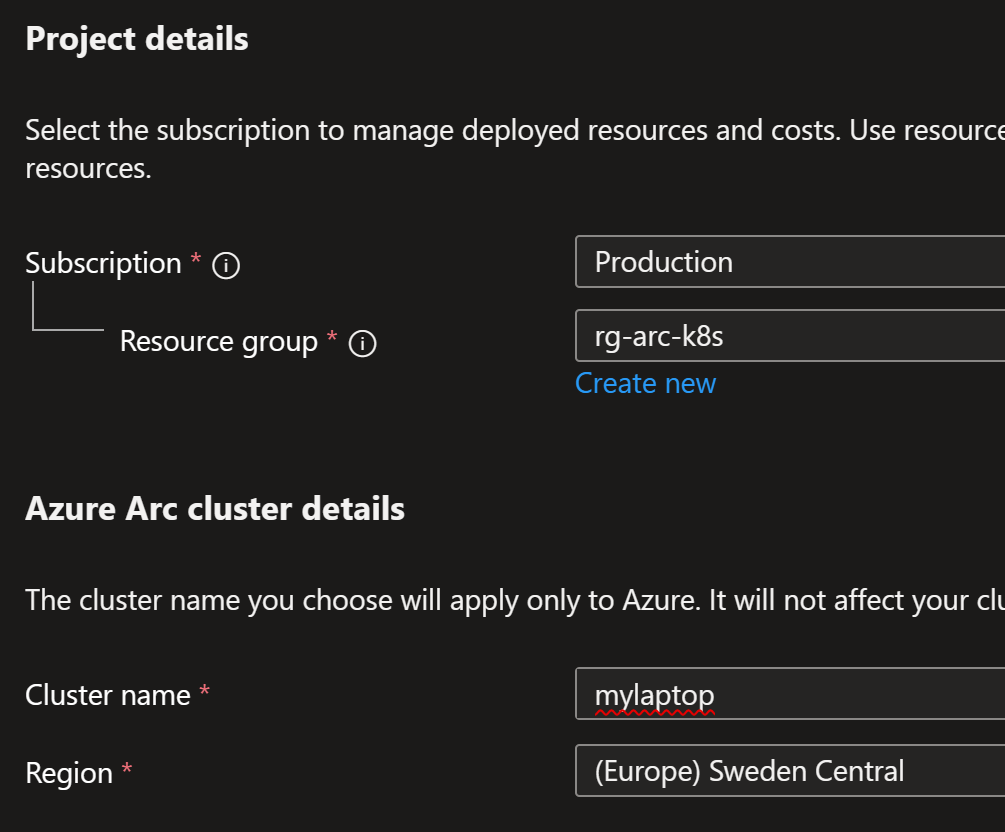
From Azure Portal, we can see that the cluster is now connected:
4. Setup workload identity
Now we’re ready to setup workload identity by installing Mutating Admission Webhook.
What is that? It’s a webhook that can modify the incoming requests to the Kubernetes API server. From Azure AD Workload Identity -> Mutating Admission Webhook:
Azure AD Workload Identity uses a mutating admission webhook to project a signed service account token to your workload’s volume and inject the following properties to pods with a service account that is configured to use the webhook:
- AZURE_CLIENT_ID: The application/client ID of the Azure AD application or user-assigned managed identity.
- AZURE_TENANT_ID: The tenant ID of the Azure subscription.
- AZURE_FEDERATED_TOKEN_FILE: The path of the projected service account token file.
Let’s install the webhook using helm:
helm install workload-identity-webhook azure-workload-identity/workload-identity-webhook \
  --namespace azure-workload-identity-system \
  --create-namespace \
  --set azureTenantID="${tenant_id}"
Let’s create a Kubernetes service account and connect it to the managed identity we created earlier:
apiVersion: v1
kind: ServiceAccount
metadata:
  annotations:
    azure.workload.identity/client-id: ${client_id}
    azure.workload.identity/tenant-id: ${tenant_id}
  name: ${service_account_name}
  namespace: network-app
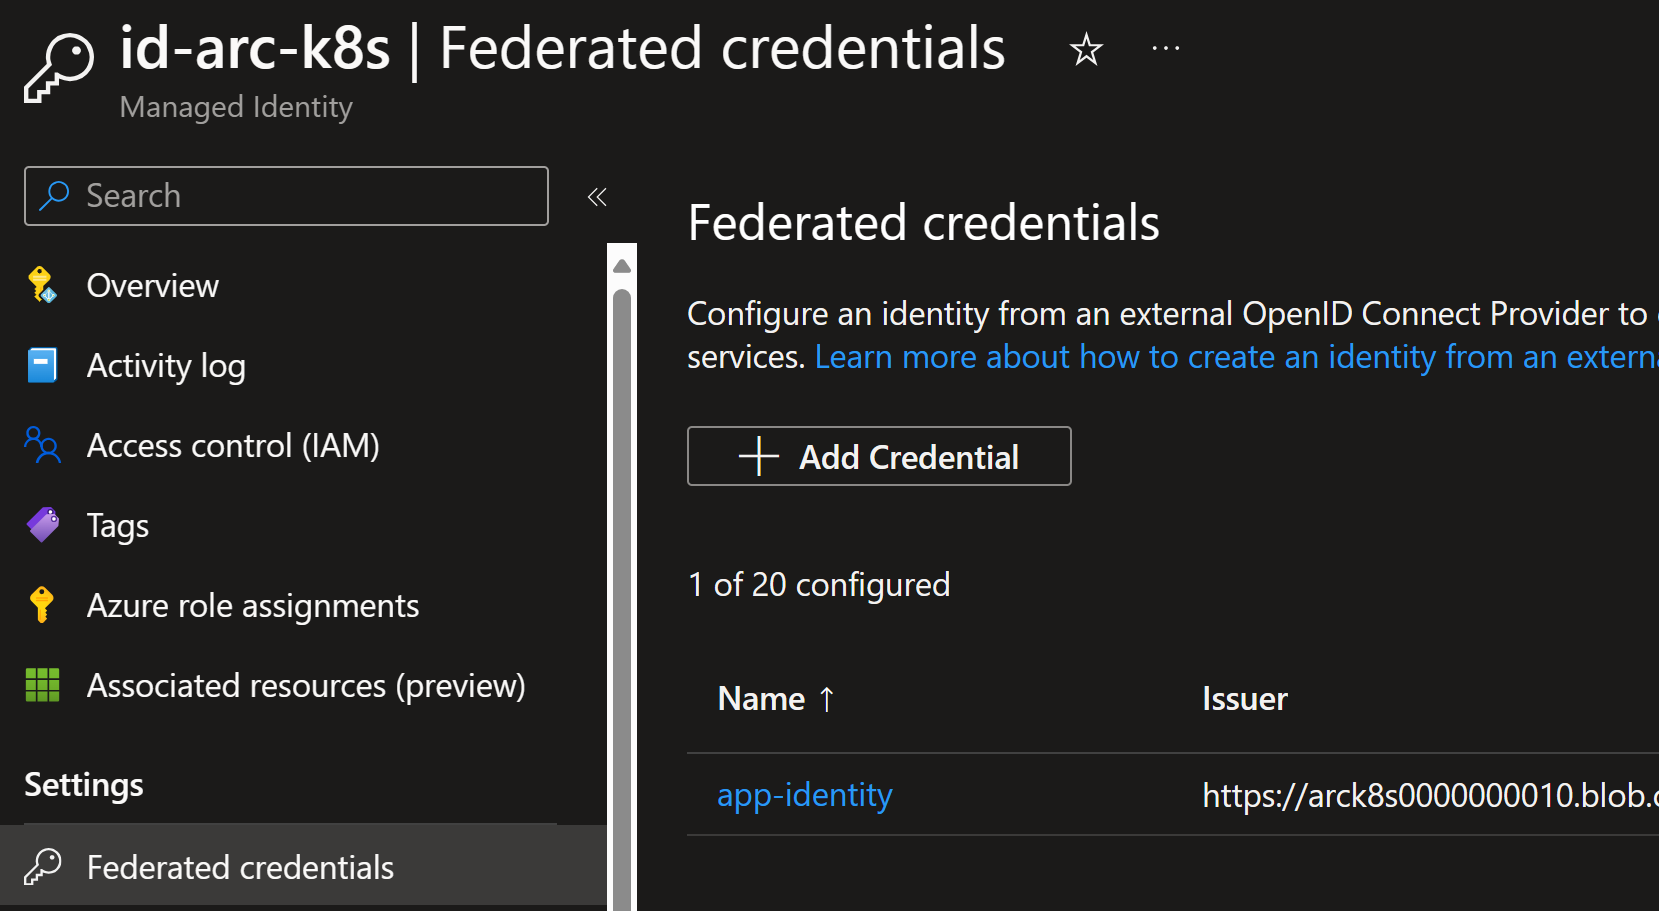
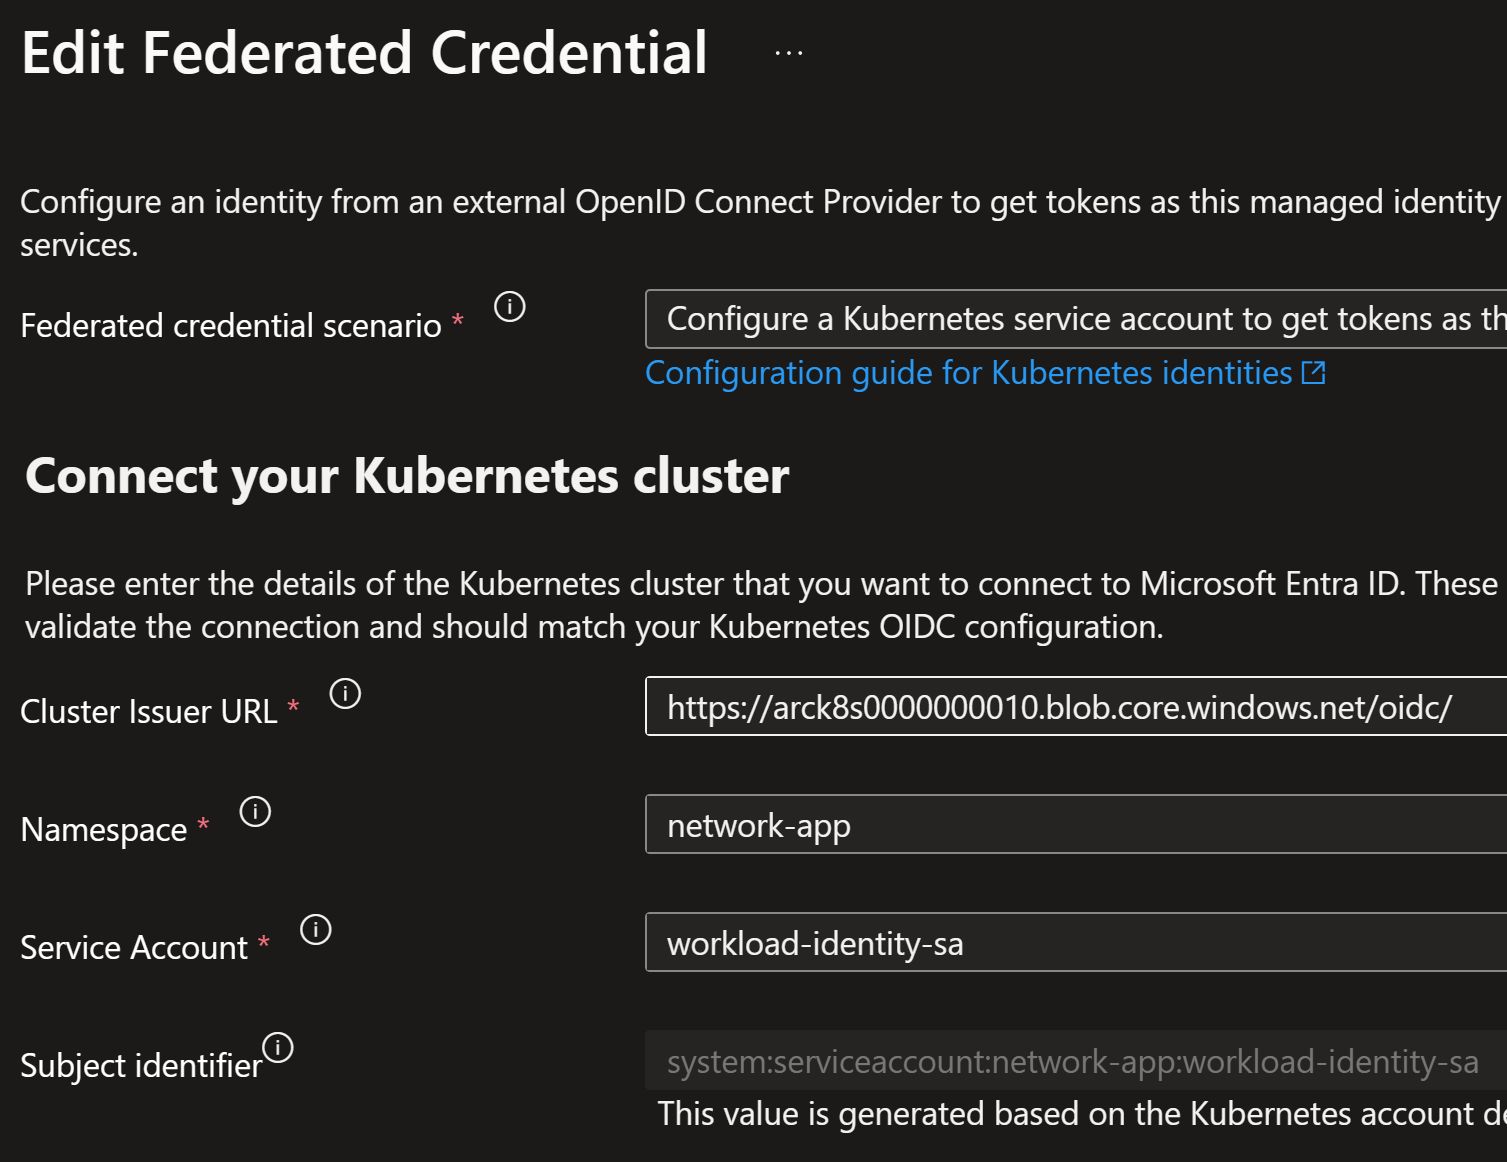
Now we connect the service account to the managed identity via federated credential:
az identity federated-credential create \
  --name "app-identity" \
  --identity-name $app_identity_name \
  --resource-group $resource_group_name \
  --issuer $service_account_oidc_issuer \
  --subject "system:serviceaccount:network-app:$service_account_name"
Federated credential is a way to connect the managed identity to the service account. Now slowly the pieces are coming together. Cluster creates the JWT token which maps to this federated credential.
Next, we’ll deploy a workload that uses the service account and see how this works in practice.
5. Deploy a workload that uses the service account
First, I’ll deploy my webapp-network-tester tool, so that I can poke around the identity setup.
Here is a snippet from the deployment file:
apiVersion: apps/v1
kind: Deployment
metadata:
  name: network-app-deployment
  namespace: network-app
spec:
  replicas: 1
  selector:
    matchLabels:
      app: network-app
  template:
    metadata:
      labels:
        app: network-app
        azure.workload.identity/use: "true"
    spec:
      serviceAccountName: workload-identity-sa
      containers:
        - image: jannemattila/webapp-network-tester:1.0.69
          name: network-app
          ports:
            - containerPort: 8080
              name: http
              protocol: TCP
To point out the important parts:
- Label
azure.workload.identity/use: "true"tells the mutating admission webhook to kick in and inject the required environment variables and token file. serviceAccountName: workload-identity-satells the Kubernetes to use the service account we created earlier.
After deployment, we can test that the managed identity is working correctly. Here is my standard test suite:
$ curl -X POST --data "INFO ENV AZURE_CLIENT_ID" "$network_app_uri/api/commands"
-> Start: INFO ENV AZURE_CLIENT_ID
ENV: AZURE_CLIENT_ID: 2af883db-8de9-4ce8-ac24-6793433eeb2c
<- End: INFO ENV AZURE_CLIENT_ID 110.95ms

$ curl -X POST --data "INFO ENV AZURE_TENANT_ID" "$network_app_uri/api/commands"
-> Start: INFO ENV AZURE_TENANT_ID
ENV: AZURE_TENANT_ID: b6d9b752-c314-43c7-9fe6-259de3628f74
<- End: INFO ENV AZURE_TENANT_ID 0.16ms

$ curl -X POST --data "INFO ENV AZURE_FEDERATED_TOKEN_FILE" "$network_app_uri/api/commands"
-> Start: INFO ENV AZURE_FEDERATED_TOKEN_FILE
ENV: AZURE_FEDERATED_TOKEN_FILE: /var/run/secrets/azure/tokens/azure-identity-token
<- End: INFO ENV AZURE_FEDERATED_TOKEN_FILE 0.19ms

$ curl -X POST --data "INFO ENV AZURE_AUTHORITY_HOST" "$network_app_uri/api/commands"
-> Start: INFO ENV AZURE_AUTHORITY_HOST
ENV: AZURE_AUTHORITY_HOST: https://login.microsoftonline.com/
<- End: INFO ENV AZURE_AUTHORITY_HOST 0.11ms

$ curl -X POST --data "FILE READ /var/run/secrets/azure/tokens/azure-identity-token" "$network_app_uri/api/commands"
-> Start: FILE READ /var/run/secrets/azure/tokens/azure-identity-token
eyJhbGciOiJSUzI1NiIsImtpZCI6Ik...m2vovF2B_XC3DiAHR40vJPLCRcTQ
<- End: FILE READ /var/run/secrets/azure/tokens/azure-identity-token 74.90ms
From the above tests, we can see that the managed identity is working and the federated token is available.
It’s important to analyze it in jwt.ms, so that you know that iss (issuer),
namespace and sub (subject) are correct:
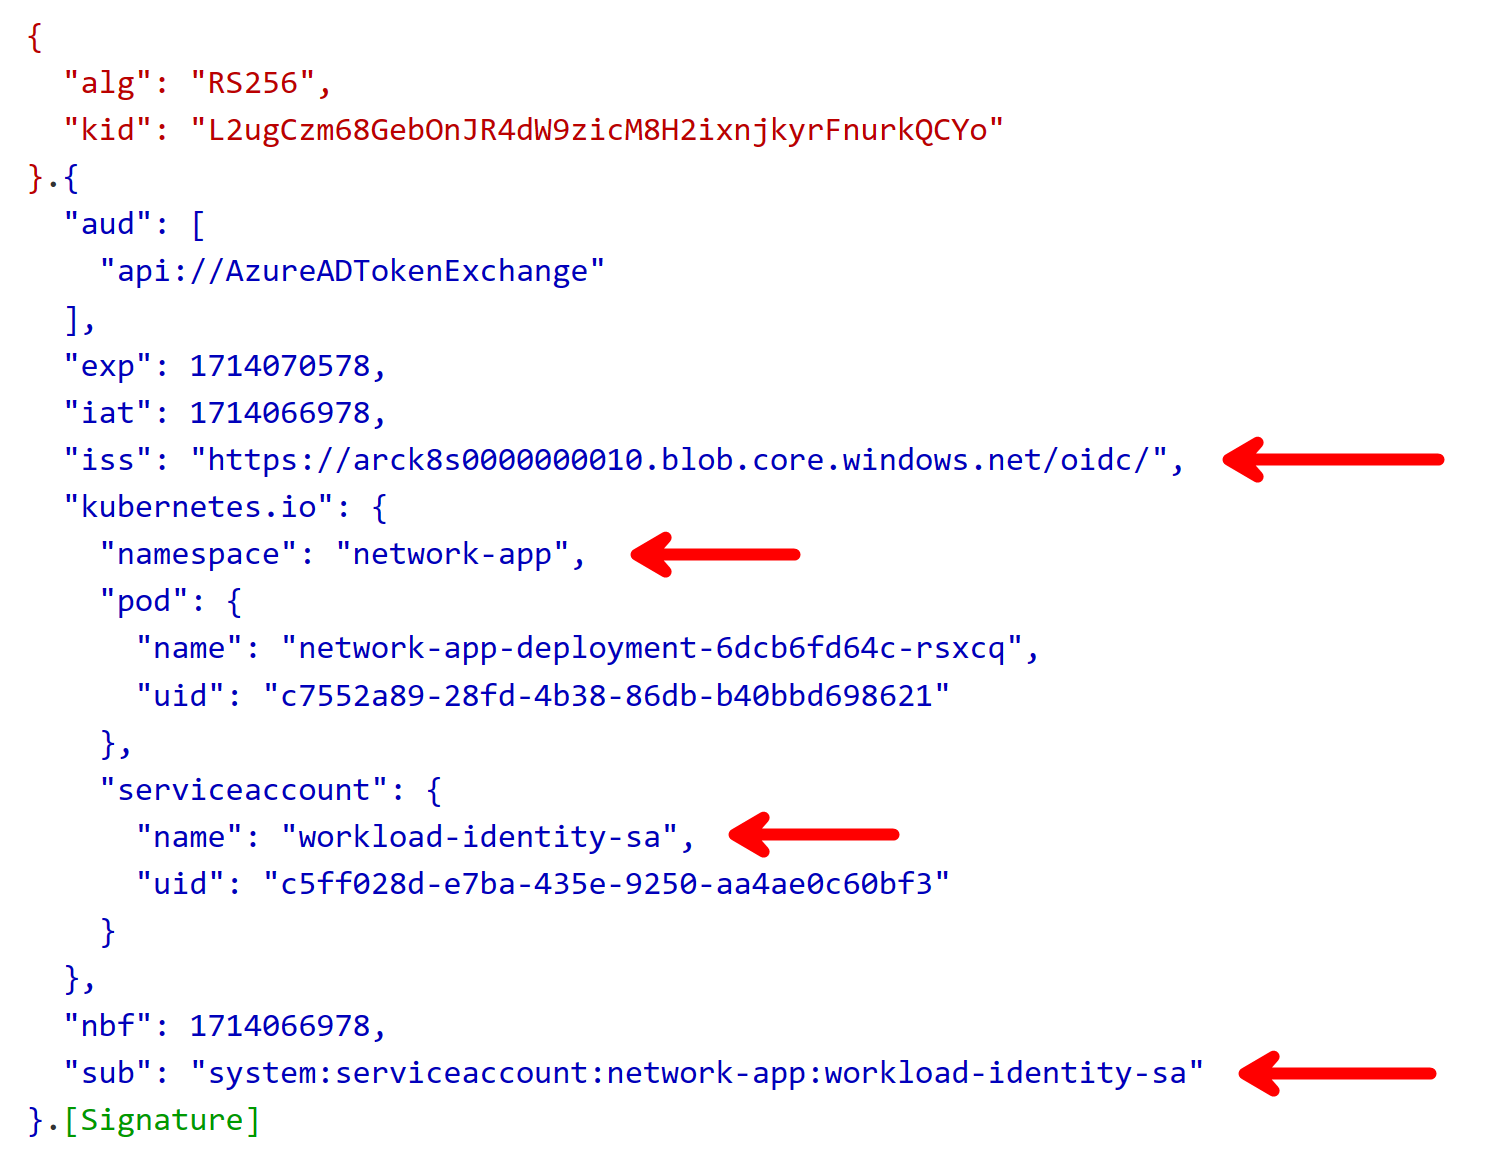
I can tell from experience, that tiny typos in the issuer or subject can cause it to fail. So, be careful with those.
Now we have a working setup where our workload is capable of using managed identity. It means that we can deploy images that inside them use Azure CLI, Azure PowerShell or Azure SDKs to access Azure resources.
Here is an example how to login to Azure using the federated token:
az login --service-principal \
  -u $AZURE_CLIENT_ID \
  -t $AZURE_TENANT_ID \
  --federated-token $(cat $AZURE_FEDERATED_TOKEN_FILE)
Connect-AzAccount -ServicePrincipal `
  -ApplicationId $env:AZURE_CLIENT_ID `
  -Tenant $env:AZURE_TENANT_ID `
  -FederatedToken (Get-Content $env:AZURE_FEDERATED_TOKEN_FILE -Raw)
In C# we could use the following code to access Azure Key Vault:
using Azure.Identity;
using Azure.Security.KeyVault.Secrets;

var keyVaultName = "kvjanne..........";
var kvUri = $"https://{keyVaultName}.vault.azure.net";
var client = new SecretClient(new Uri(kvUri), new DefaultAzureCredential());
KeyVaultSecret secret = client.GetSecret("secret1");
Console.WriteLine($"Secret: {secret.Value}");
DefaultAzureCredential will internally use the workload identity (among other options):
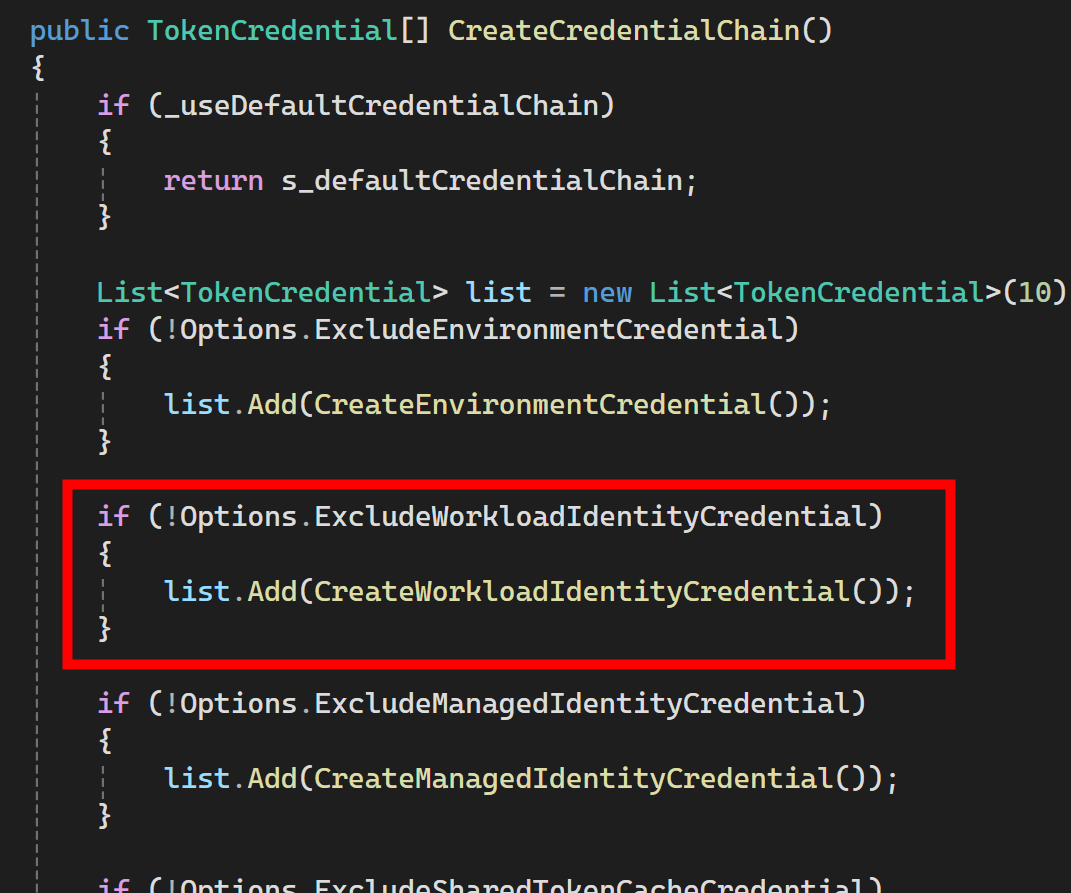
Inside that it will dig up the information from environment variables and use it to authenticate to Azure:
internal class EnvironmentVariables
{
  public static string TenantId =>
    Environment.GetEnvironmentVariable("AZURE_TENANT_ID"));

  public static string ClientId =>
    Environment.GetEnvironmentVariable("AZURE_CLIENT_ID"));

  public static string AzureFederatedTokenFile =>
    Environment.GetEnvironmentVariable("AZURE_FEDERATED_TOKEN_FILE");
}
Read more about Azure Identity client libraries with Workload Identity.
Troubleshooting
DNS issues
If you get Resource temporarily unavailable for login.microsoftonline.com when you try to resolve it from your pods,
then you might have one of the following issues:
- DNS Resolution randomly fails in 3.6.0
- Docker Desktop running pods on WSL cannot resolve host name
- Can’t access external website with local Kubernetes in docker-desktop 4.25.0 releae
You can test it with the following commands (using my webapp-network-tester tool):
$ curl -X POST --data "IPLOOKUP login.microsoftonline.com" "$network_app_uri/api/commands"
-> Start: IPLOOKUP login.microsoftonline.com
System.Net.Sockets.SocketException (00000001, 11): Resource temporarily unavailable
   at System.Net.Dns.GetHostEntryOrAddressesCore(String hostName, Boolean justAddresses, AddressFamily addressFamily, Nullable`1 startingTimestamp)
   at System.Net.Dns.<>c.<GetHostEntryOrAddressesCoreAsync>b__33_0(Object s, Int64 startingTimestamp)
   at System.Net.Dns.<>c__DisplayClass39_0`1.<RunAsync>b__0(Task <p0>, Object <p1>)
   at System.Threading.Tasks.ContinuationResultTaskFromTask`1.InnerInvoke()
   at System.Threading.ExecutionContext.RunFromThreadPoolDispatchLoop(Thread threadPoolThread, ExecutionContext executionContext, ContextCallback callback, Object state)
--- End of stack trace from previous location ---
   at System.Threading.ExecutionContext.RunFromThreadPoolDispatchLoop(Thread threadPoolThread, ExecutionContext executionContext, ContextCallback callback, Object state)
   at System.Threading.Tasks.Task.ExecuteWithThreadLocal(Task& currentTaskSlot, Thread threadPoolThread)
--- End of stack trace from previous location ---
   at WebApp.Controllers.CommandsController.ExecuteIpLookUpAsync(String[] parameters) in /src/src/WebApp/Controllers/CommandsController.cs:line 334
   at WebApp.Controllers.CommandsController.Post(String body) in /src/src/WebApp/Controllers/CommandsController.cs:line 94
<- End: IPLOOKUP login.microsoftonline.com 183.70ms

$ curl -X POST --data "IPLOOKUP bing.com" "$network_app_uri/api/commands"
-> Start: IPLOOKUP bing.com
IP: 13.107.21.200
IP: 204.79.197.200
IP: 2620:1ec:c11::200
<- End: IPLOOKUP bing.com 149.37ms#
Clearly, the login.microsoftonline.com is not resolving correctly for some reason.
Therefore, the authentication will fail with various error messages.
To fix this, you can try using external DNS server in the deployment (for example Cloudflare) by setting dnsConfig:
# deployment abbreviated
      dnsPolicy: "None"
      dnsConfig:
        nameservers:
          - 1.1.1.1
Subject not found in federated credential
If your subject in the JWT token is e.g.,
system:serviceaccount:network-app:workload-identity-sa-abc
and during the authentication you get the following error:
Connect-AzAccount: /bin/run.ps1:42
Line |
  42 |  Connect-AzAccount @params
     |  ~~~~~~~~~~~~~~~~~~~~~~~~~
     | ClientAssertionCredential authentication failed: A configuration issue
     | is preventing authentication - check the error message from the server
     | for details. You can modify the configuration in the application
     | registration portal. See https://aka.ms/msal-net-invalid-client for
     | details.  Original exception: AADSTS700213: No matching federated
     | identity record found for presented assertion subject
     | 'system:serviceaccount:network-app:workload-identity-sa-abc'. Please
     | check your federated identity credential Subject, Audience and Issuer
     | against the presented assertion.
     | https://docs.microsoft.com/en-us/azure/active-directory/develop/workload-identity-federation Trace ID: 76057962-ba13-43fe-9902-a9960a412301 Correlation ID: a775f8a5-1f7c-4682-bb5c-7b29e015dc8e Timestamp: 2024-04-26 11:17:20Z Could not find tenant id for provided tenant domain 'f3296a34-479c-401a-a838-4a61d2d94703'.
AADSTS700213: No matching federated identity record found for presented assertion subject system:serviceaccount:network-app:workload-identity-sa-abc.
Please check that it matches the subject in the federated credential:
In the above example, they don’t match and that’s why the authentication fails.
Related to this, there is very interesting discussions about Federated identity credentials support for wildcards in the GitHub issues.
Conclusion
In this post, we have seen how to use Microsoft Entra Workload ID with Azure Arc-enabled Kubernetes. We have created required signing keys, published metadata and JWKS documents to a publicly accessible location, created a Azure Arc-enabled Kubernetes cluster, created a managed identity, created a Kubernetes service account, and deployed a workload that uses the service account.
This is a powerful feature that allows you to use managed identities for your workload and you don’t have to manage any secrets except for the signing keys of course. Key rotation of the signing keys is extremely important so please plan ahead for that.
I hope you find this useful!