App Service as proxy to Blob Storage
Posted on: September 23, 2024Over the years I’ve heard the following requirements quite many times from my customers:
We need to allow users to upload large files to our app
Or other way around:
We need to allow users to download large files from our app
And
We don’t want to expose our backend storage to the users
The above requirements are typically combined with the following:
We host our application in App Service, and we store our files to Blob storage
I found my first implementation to this from 2016 so it’s about time to create a blog post about this topic. In the future, when asked about this, I’ll share the link to this post.
Since one of the requirements said that users should not have direct access to the backend storage, then shared access signature (SAS) based access is not the solution.
The problem statement is simple, and it means that we need to have an App Service between the users and the backend Blob storage:

The above architecture allows us to even have multiple storage accounts behind the App Service.
Quite often the first question when implementation starts is: “Why does my request time out after 230 seconds?”. Reason is quite simple – App Service expects to operate in Request-Response manner but if you try to operate with large files, then your operation might timeout.
Let’s now enhance the above architecture a bit by introducing managed identity to App Service:
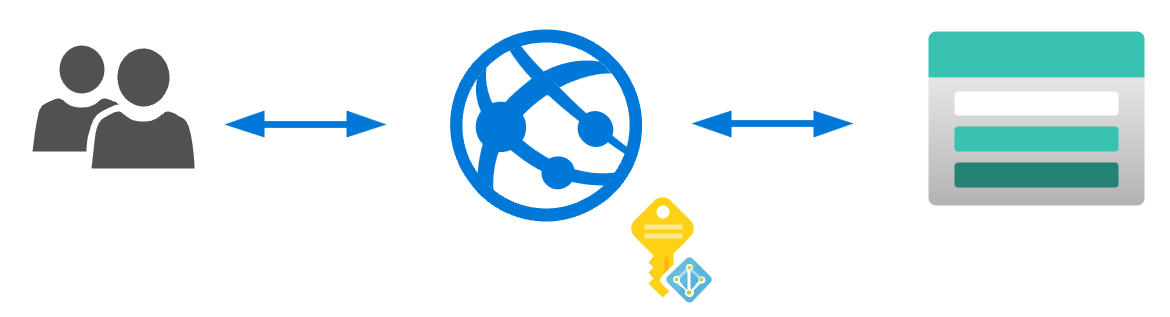
This allows us to avoid using any storage account keys in the App Service code and just rely on Azure RBAC.
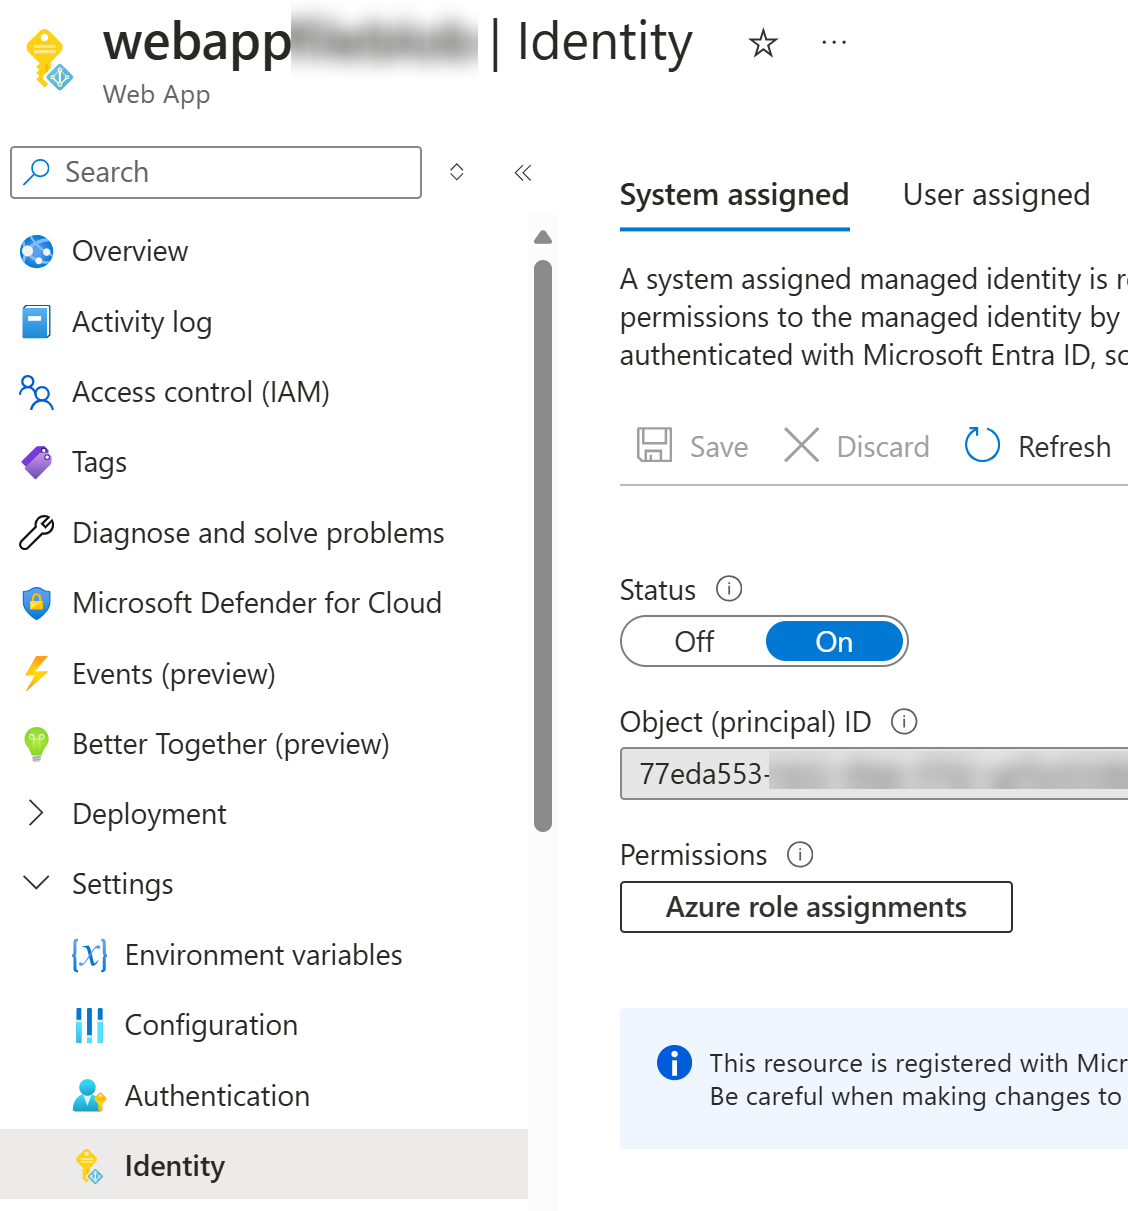
Here’s how you enable system assigned managed identity to the App Service:
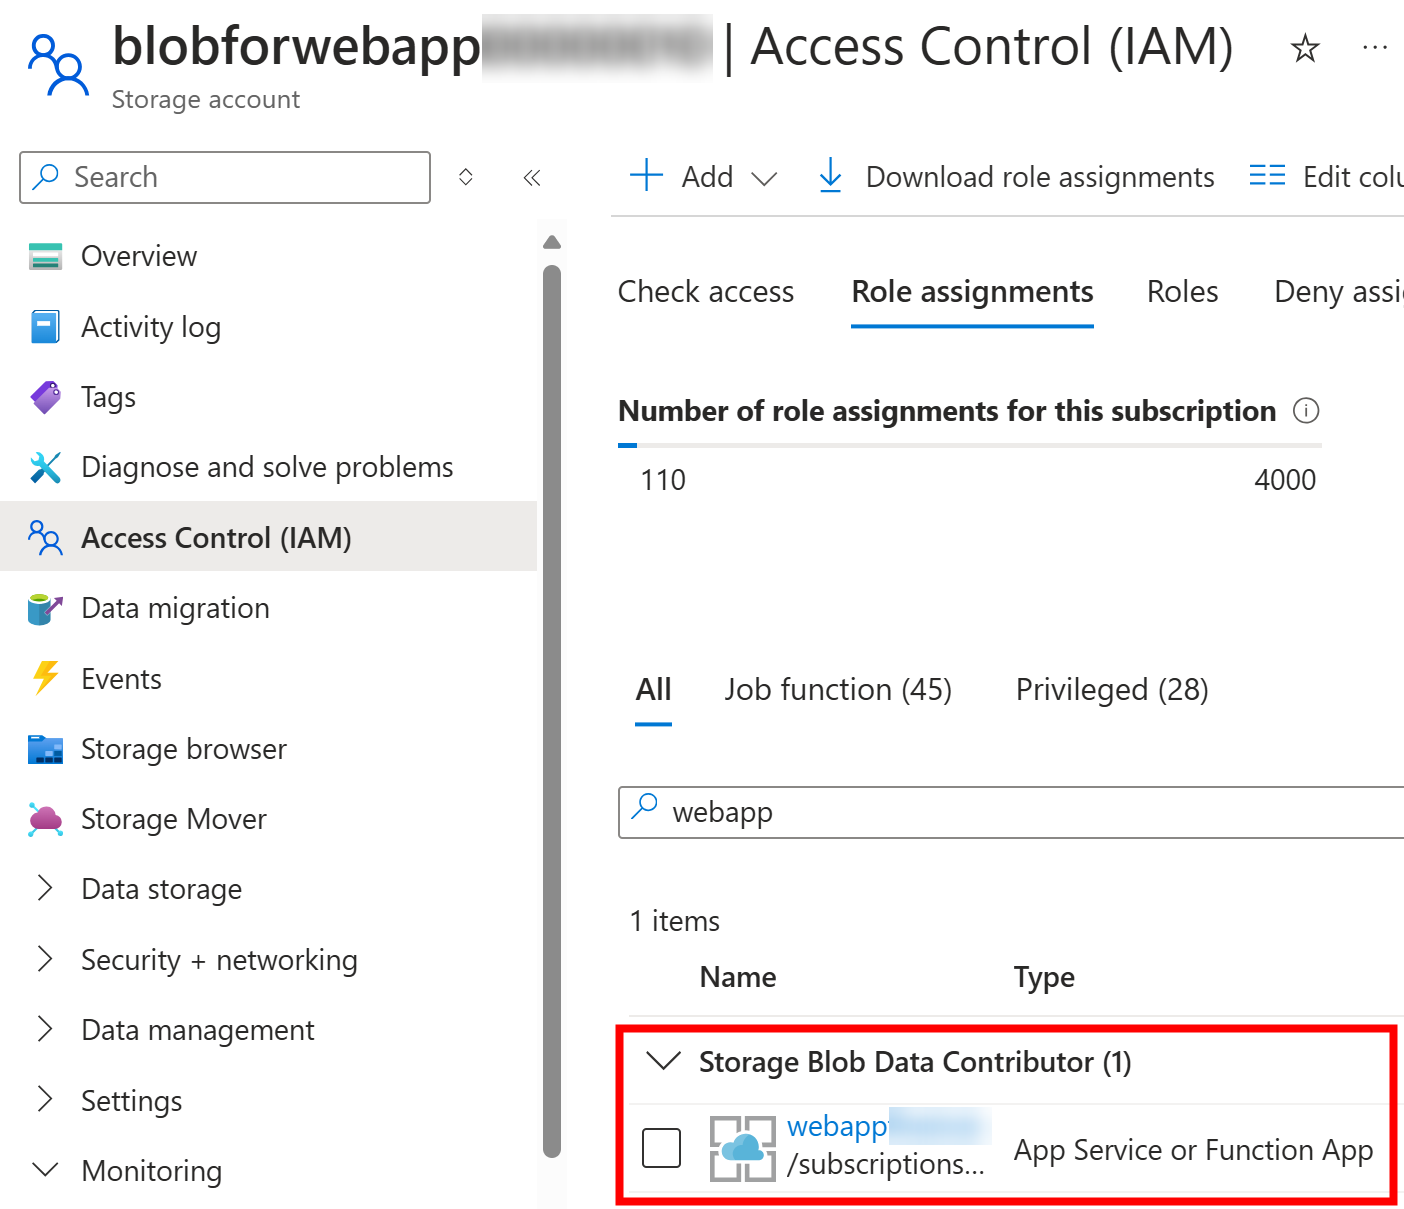
Next step is to allow that identity to manage blobs in storage account by granting “Storage Blob Data Contributor” role to it:
On purpose, I’ve skipped setting up Virtual Network and Private Endpoint of the storage account but that is what you want to do in your actual implementation. I want this demo setup to be minimal so you can test this out as well.
Finally, the only thing missing is our application code!
Let’s start with the download scenario where we want to download a file from the Blob storage:
We’ll implement the following Blob download API to our App:
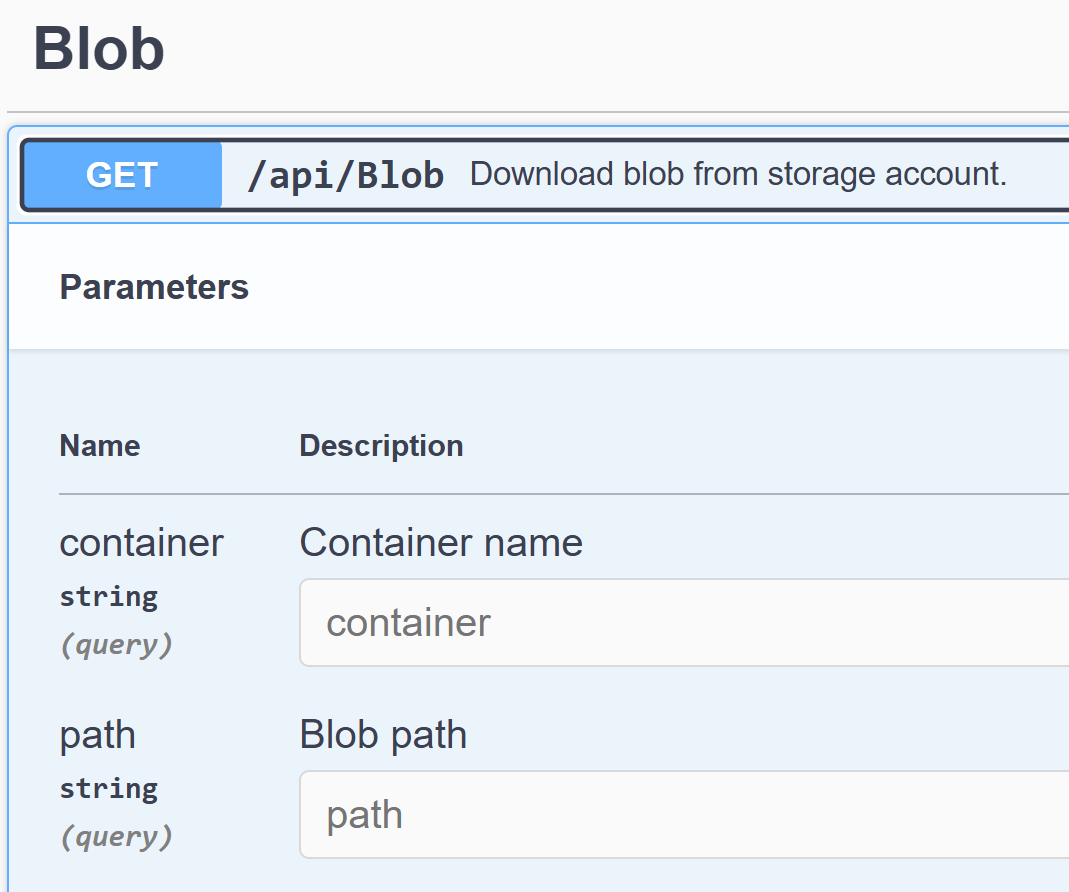
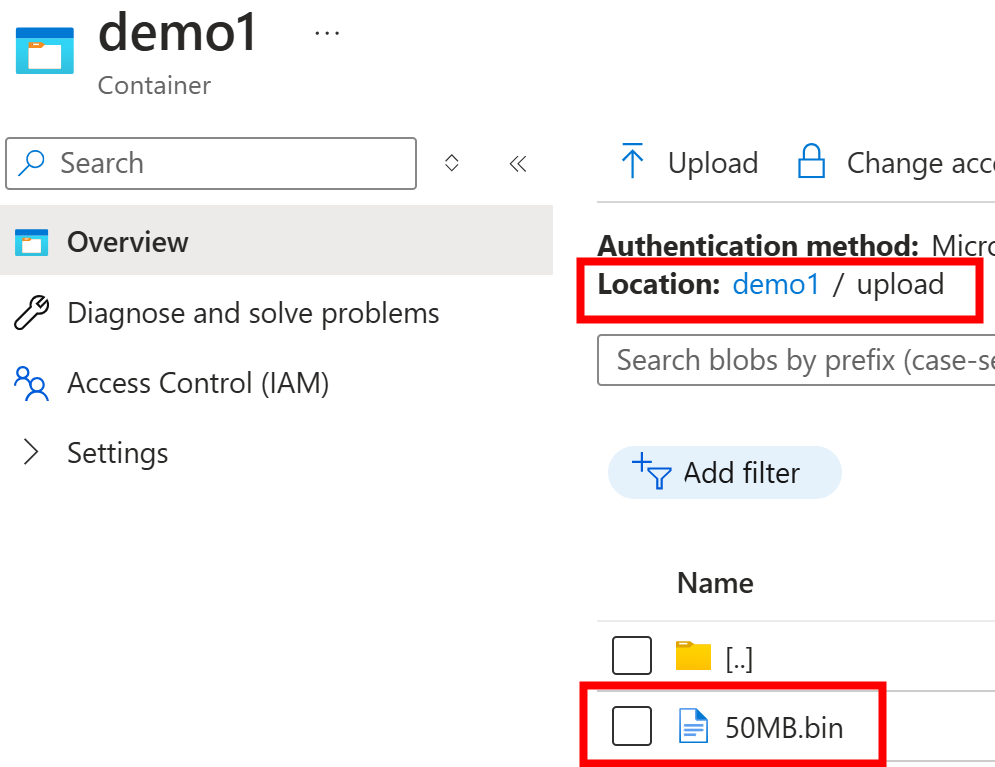
The above translates to the following URL:
/api/blob?container=demo1&path=upload/50MB.bin
Since this is demo, I’ll just pass in the container name and path to file directly in the URL parameters.
In your own real implementation, you should not expose those directly to the user.
You should use some sort of unique identifier in the URL which would map to row in your database. Before processing the download, you would validate the current user and their access rights to the file. Information in the database has a link to the correct blob in the storage and if everything is ok, then you would start the download. But I’m only focusing on the download mechanics in this post.
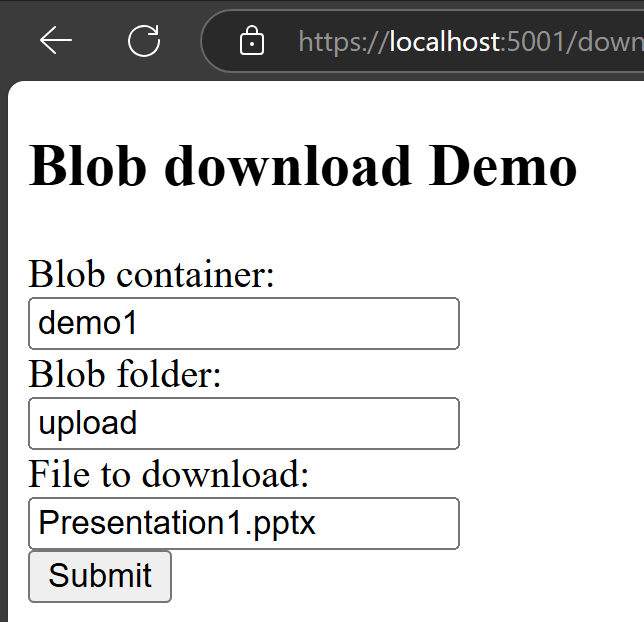
Here is my very good-looking user interface for this download demo scenario:
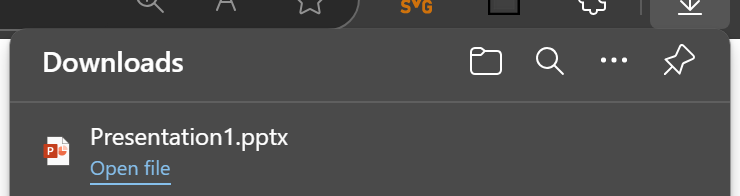
User can click the download button and the file is downloaded:
Here is the example download method implementation (GitHub link to full source at the end of this post):
[HttpGet]
public async Task<ActionResult> Download(string container, string path, CancellationToken cancellationToken)
{
  var blobContainerClient = _blobServiceClient.GetBlobContainerClient(container);
  var blobClient = blobContainerClient.GetBlobClient(path);
  var filename = Path.GetFileName(path);

  var blob = await blobClient.DownloadStreamingAsync(cancellationToken: cancellationToken);
  return File(blob.Value.Content, blob.Value.Details.ContentType, filename);
}
The above code used the DownloadStreamingAsync method to pass the stream directly to the File method.
This way we don’t need to load the entire file into memory before sending it to the user.
Here is view from Task Manager when downloading a 1000MB file:
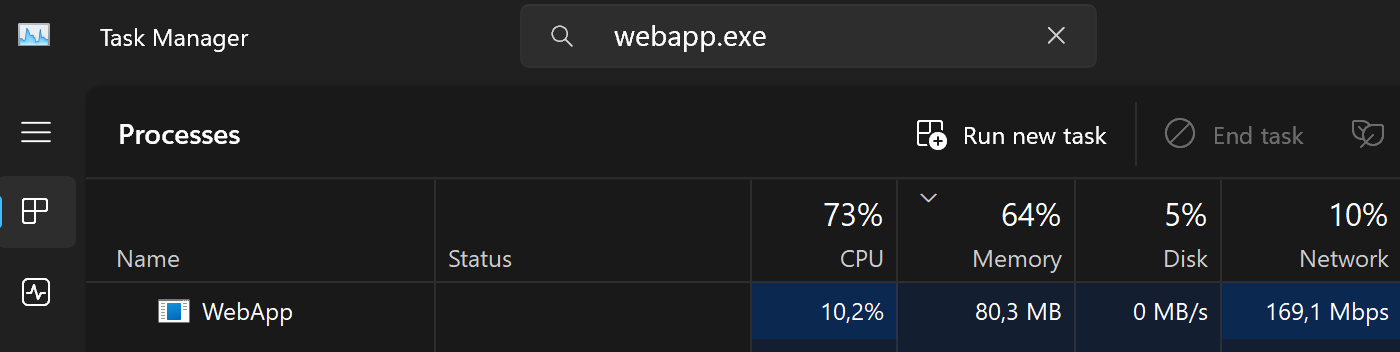
Download does not timeout even with large files because we are continuously streaming the file content to the user.
You can test the above code by running the following curl command against your deployed App Service:
curl \
 --request GET \
 --url 'https://<app>.azurewebsites.net/api/blob?container=demo1&path=upload/50MB.bin' \
 --output 50MB.bin
Or you can use your browser to download the file:
https://<app>.azurewebsites.net/download.html
So, download seemed to be just a few lines of code but let’s see what happens with our upload scenario.
But first we need to understand the difference between upload and download performance. It’s very common to have quite good download speeds even with mobile connections but the upload speeds might be quite the opposite. Build your solution with this in mind.
The second thing you might bump into when you start testing is that after files get larger you start to see errors. Errors might indicate that the file could not be processed due to large size. This might lead you to a path of configuring various parameters that would allow larger and larger files to be uploaded. However, that is not going to be a solution in the long run and we need to look for an alternative solution: Chunking.
From Wikipedia - Chunking:
Chunking refers to a facility that allows inconveniently large messages to be broken into conveniently-sized smaller “chunks”.
The idea is to split the file into smaller chunks and then upload those chunks to the Blob storage as block blobs. When all chunks are uploaded, then we can commit the uploaded block blobs.
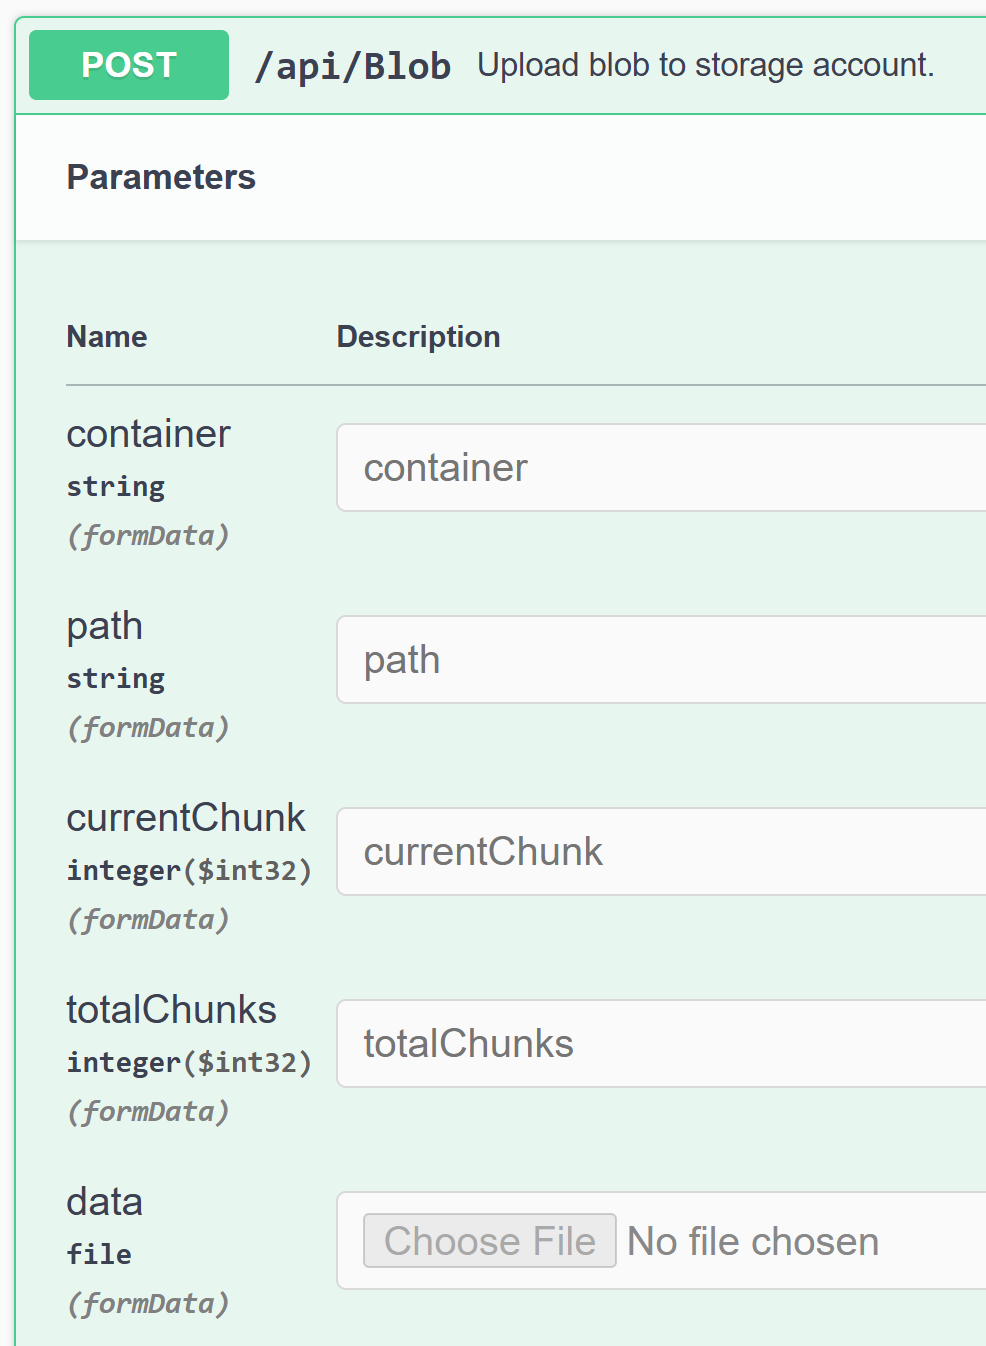
We’ll implement the following Blob upload API to our App:
Chunks also help to build a progress bar for the end user so they can see how much of the file has been uploaded. Here is my user interface for this:

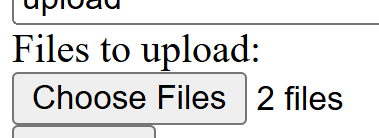
Users can select multiple files to upload:
And then the upload starts and updates are shown to the user:
Obviously, you can replace the above with fancy progress bars and other UI elements, but I wanted to keep this simple.
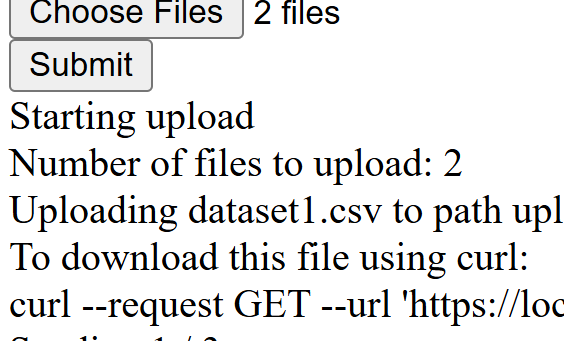
Here is the output from the upload of two files:
Starting upload
Number of files to upload: 2
Uploading dataset1.csv to path upload/dataset1.csv in 3 chunks
To download this file using curl:
curl --request GET --url 'https://localhost:5001/api/blob?container=demo1&path=upload/dataset1.csv' --output dataset1.csv
Sending 1 / 3
Sending 2 / 3
Sending 3 / 3
Uploading dataset2.csv to path upload/dataset2.csv in 3 chunks
To download this file using curl:
curl --request GET --url 'https://localhost:5001/api/blob?container=demo1&path=upload/dataset2.csv' --output dataset2.csv
Sending 1 / 3
Sending 2 / 3
Sending 3 / 3
Upload completed
Here is the example upload method implementation (full source available in GitHub):
[HttpPost]
public async Task<ActionResult> Upload(
  [FromForm] string container, [FromForm] string path, [FromForm] int currentChunk, [FromForm] int totalChunks,
  IFormFile data, CancellationToken cancellationToken)
{
  var blobContainerClient = _blobServiceClient.GetBlobContainerClient(container);
  var blobClient = blobContainerClient.GetBlockBlobClient(path);

  if (currentChunk == 1 && await blobClient.ExistsAsync(cancellationToken: cancellationToken))
  {
    return BadRequest("Blob already exists");
  }

  using var stream = data.OpenReadStream();
  var blockId = Convert.ToBase64String(Encoding.UTF8.GetBytes(currentChunk.ToString("d6")));
  var blockBlob = await blobClient.StageBlockAsync(blockId, stream, cancellationToken: cancellationToken);

  if (currentChunk == totalChunks)
  {
    var blockIds = new List<string>();
    for (var i = 1; i <= totalChunks; i++)
    {
      blockIds.Add(Convert.ToBase64String(Encoding.UTF8.GetBytes(i.ToString("d6"))));
    }
    await blobClient.CommitBlockListAsync(blockIds, cancellationToken: cancellationToken);
  }
  return Ok();
}
The above code validates that the blob does not exist before starting the upload. It then stages the block and commits the block list when all chunks have been uploaded.
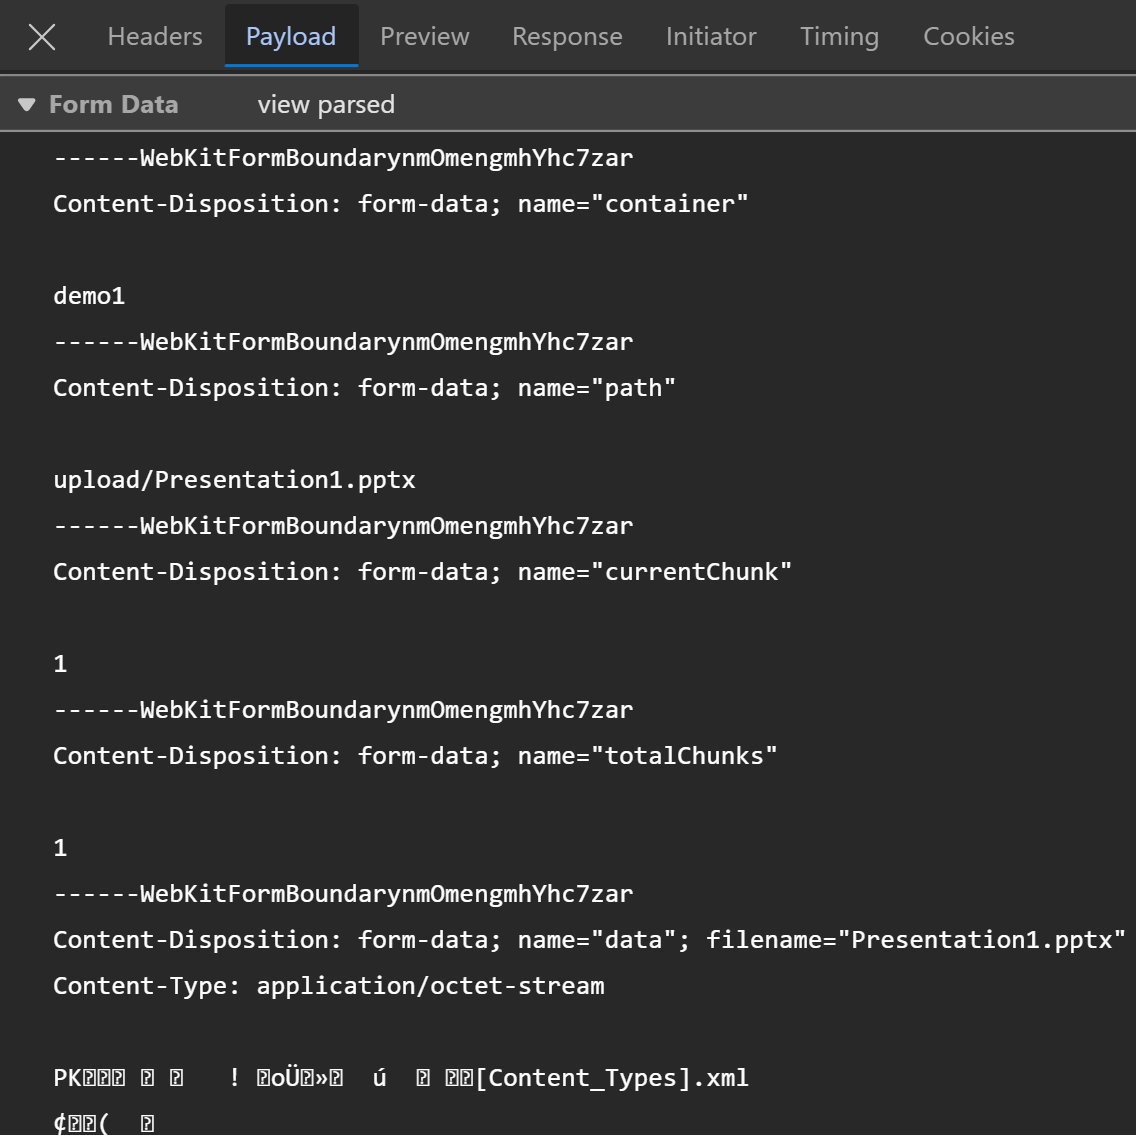
If you’re wondering about the payload for the above method, here is an example:
You can use your browser for uploading files:
https://<app>.azurewebsites.net/upload.html
This is a very simple implementation, and you should use more advanced techniques in your real implementation. For example, you should store the state of the upload process in a database so have visibility of the upload processes. So, instead of single method call, you most likely split this to be a multi-step process.
You can find the above example in my GitHub:
 JanneMattila/webapp-and-folders
And the image is available in Docker Hub:
Conclusion
This was a very simplified example how to use App Service between user and Blob storage. I hope it gives you a good starting point for your own implementation.